
I do a lot of seed starting to keep up with our market production. I’ve learned to avoid a lot of common pitfalls and hopefully, you can learn from my mistakes.
Don’t Start Seeds Too Early
One of the biggest issues people get themselves is starting seeds too early for their own good. Most seedlings are expected to be transplanted outside 30 to 60 days after sowing the seeds. When you plant earlier than this without specialized equipment, you will have problems with plant stunting, lack of proper light, and lesser disease resistance.
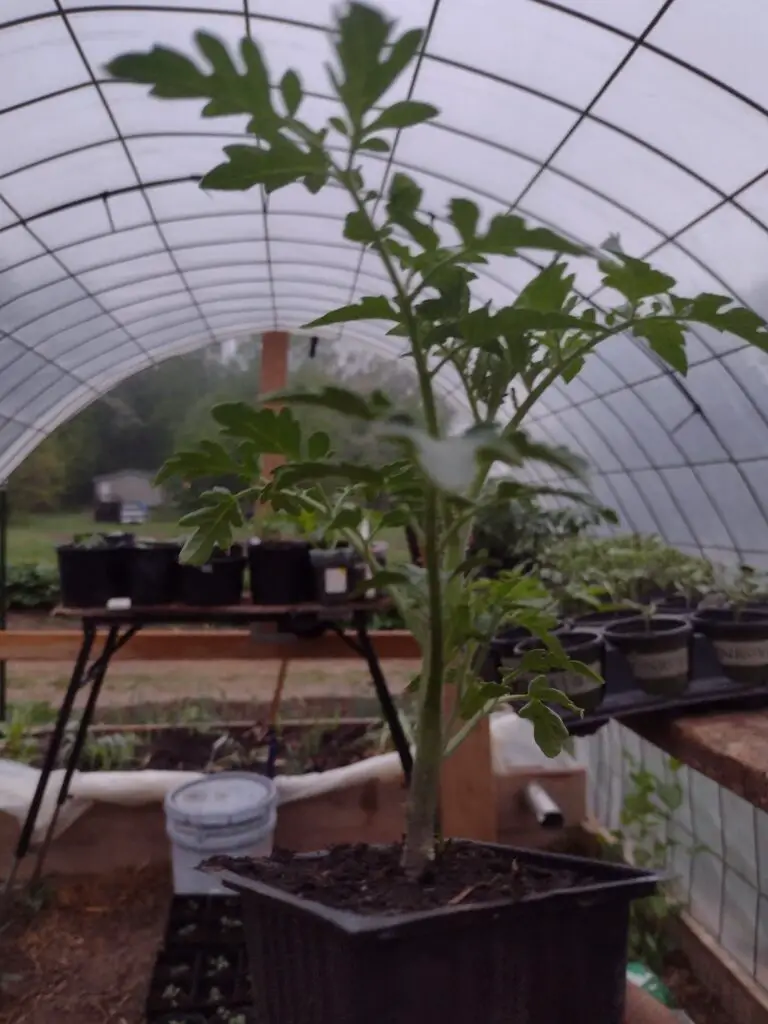
For example, a tomato plant started two and a half months early should be nearly three feet tall and two feet wide in good condition. That’s a lot of space. I can’t put many of those on my seedling shelves. As plants grow, their fertility needs and sunlight needs become more extreme. In my consultations, have seen that fairly often and it gets pretty bad.
All the sudden, plants finally get their feet in the ground and want to explode with growth. It very often becomes more to keep up with than people have extra time. Things get neglected and they get sickly. It can be mitigated with close monitoring, but it’s just not something I recomend because so many people have trouble with it. Like credit cards, it usually bites you.
faster growing plants like melons, beans, peas, and squashes should not be started indoors in my opinion. They are very easily damaged during transplanting and they grow very big very fast. If they are started indoors, they usually need planting outside after 2 weeks or so.
Know How Big Your Seedlings Will Get
Every plant variety has different growth rates and growth habits. Every situation has a slightly different effect on that growth. You need to be able to estimate how big your plants will get before they go outside so you know how much space you will need and how many plants you actually have room for.
It does depend on some, but I expect something like a tomato to be 18 inches tall at transplant time if you started it 2 months early. Some grow a bit slower, and it can depend on your lighting and temperature. Cooler temperatures retard plant growth and tomatoes are very sensitive to air temperatures under 67 degrees.
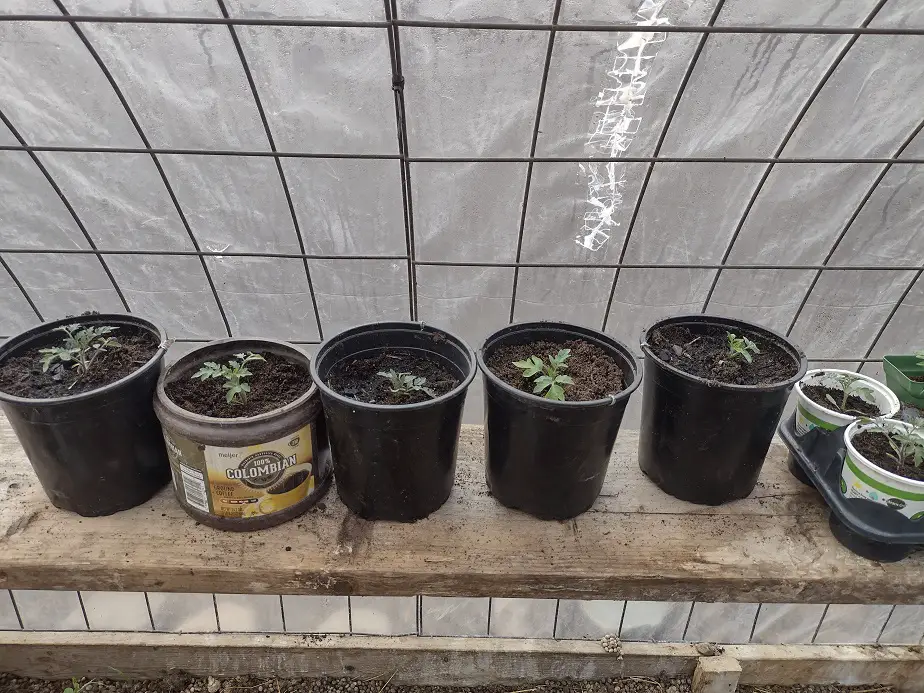
Also, consider the size of pots you will need for your plants. I have a rule of thumb. Plants should be no more than twice the height of the pot. From the standpoint of considering plant health and vigor, that’s a very good rule to stick to. But, you also need to consider the total soil volume in a pot. Another much too common problem is having plants in too small fo a pot. It makes for weak, sick plants after transplanting.
Honestly, I prefer to transplant things as early (and thus as small) as possible. The earlier in a plant’s growth cycle, you can get in in the ground, the better it will acclimate to your soil and grow a more robust root system. The microbiology in your outside soil will have effects on your plant’s hormone regulation and genetic expression, all for the better. The younger/smaller you can afford to get them in the ground, the better.
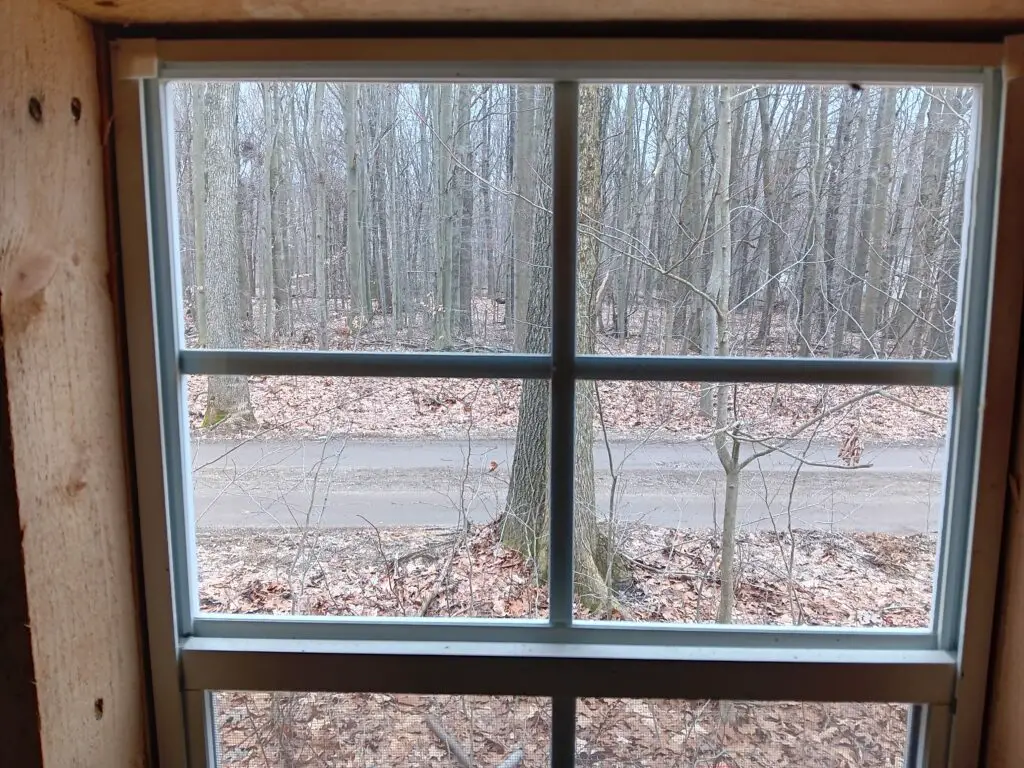
Avoid Using Windows
Windows are often a poor place for starting seeds. Even though they are commonly used, they seldom provide enough light and are normally too cold for most young seedlings. Starting seeds on a window sill will often not produce the same quality of results that can be achieved with a warm shelf and good plant lights.
Sunlight on a clear day is about 10,000 lumens per square foot at ground level. That’s great, Unfortunately, most household windows let in less than 1,000 lumens per square foot. A good south-facing window is better and will have enough light if your plants are very close to it, the glass is clean, and the sky is clear. If not, you’re probably going to have seedling trouble.
I grew a lot of unhealthy seedlings until I stopped trying to use my windowsills. Most windows weren’t installed with seedlings in mind. The other half of the issue is that the coldest place in a house is right in front of a window. Seeds and seedlings are all very temperature-sensitive and most need a lot of heat. It’s hard to keep a windowsill warm enough.
If you have your thermostat set to 70 degrees F, it’s probably barely 60 on the windowsill. That’s too cold for a lot of seedlings. You may get past that with a heating mat to give extra warmth, but I find it much easier ti just put my seedlings in a warmer spot and supplement the lighting instead of heat.
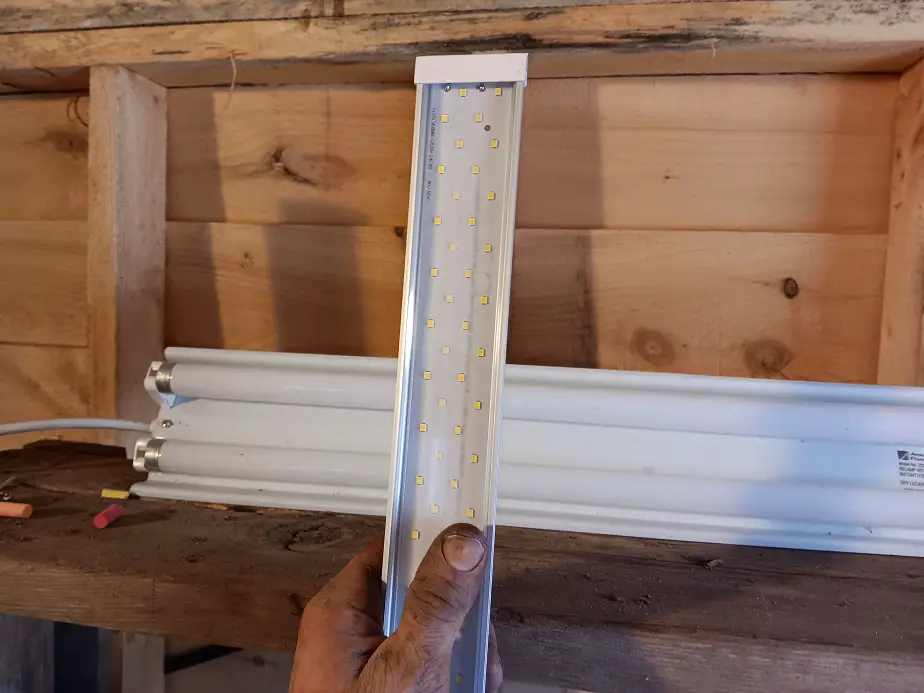
Don’t Buy Expensive Plant Lights
Most lights sold as plant lights are actually just normal lights with different branding and packaging at a significantly higher price. You can buy the same light for cheaper if you look at shop lights. Some specialty plant lights are better, but only slightly and the cost is in the hundreds of dollars for one.
Led and florescent shop lights are commonly used by professional growers for both seedlings and full-sized plants. I have used fluorescent t-8 tube lights, but I’m switching over to LED lights as I expand my growing operation. I am currently installing SZHLUX 8,700-lumen LED lights. They have by far the best output I’ve found for under the cost of a home mortgage.
I paid around $90 for a pack of six. Here’s a link to it on Amazon be sure to get the SZ- model, not the ZM-. It’s better for plants.
Monitor Temperature Constantly
You need to check the ambient temperature of your seedlings two or three times daily. Just monitoring air temperature is enough. Cool-weather plants can handle 60-65 degrees fairly well but warm-weather plants prefer a minimum of 70 degrees air temperature. The warmer the air, the faster your seeds will germinate and grow.
I use storage a set of storage shelves to hold my seedlings. I have found the temperature to differ in the 18 inches between shelves by a degree or so, getting colder as it gets lower. That means two things, I should put my warmer-preferring seeds toward the top, and I need to monitor the temperature of multiple shelves.
I have a wireless thermometer on each shelf and the display screen is on the wall in my living room. Every time I walk by, glance at my temperatures. There is one unit in particular that I have found to be both cheap and durable. I use and recomend this wireless thermometer. I use it in my greenhouse and on my sheed shelves. I even buried it once to watch my soil temperature all summer long. Here’s a link to it on Amazon.
Turn Up The Thermostat
Turning up the heat a few degrees for a month will likely benefit your seedlings significantly. The average home is around 67 to 69 degrees in the winter. Most garden seeds will sprout at 67 degrees but will germinate twice as fast at 70. Seeds and seedlings show significantly increased growth to only one or two degrees increase in ambient temperature.
It’s a painful decision, but even I turn up the heat for my seedlings now. As a bachelor, I used to heat my house to 45-50 degrees F. I don’t like seeing my fuel consumption rack up like that. I can skimp by but my seedlings can’t. We’re trying to re-create the condition of nature here and it’s hard. Nature has been programmed with these seasons and conditions. We are trying to artificially re-construct them.
Instead of heating up your whole home, you may be able to just heat a single room extra with a cheap electric space heater. Just be sure you monitor the temperature in there. I actually had seedlings in our nursery room for a while. We kept it warmer in there for the baby and I turned off the lights for night every day. It actually worked pretty well.

Cover Seeds with Plastic Wrap to Speed Germination
If you cover pots and seed trays with plastic wrap, they will stay moist and have a more consistent temperature. It makes a more ideal germination environment for seeds. You must remove the cover when seedlings first start emerging and make sure they have good light at that time.
Check your seedlings at least twice daily to see when they have started emerging and pull the plastic off right away. The seed can germinate fine if covered, but the seedlings need fresh air. I don’t fret too much about it, but I do really want the plastic wrap off the same day I notice emergence.
Let Your Soil Dry a Bit
Most of the seed starting tray kits you buy have a plastic cover to keep a more optimized environment inside for the seed. It’s a great idea, but the clear plastic lids never last as long as the tray or cells. I have found that I can just take a sheet of cheap plastic wrap and cover my seedlings with that instead. It works great. a regular-width roll will cover a standard 10×20 tray, or any pot 10 inches or less in diameter at the top.
Most seedlings are over-watered, leading to various plant infections and diseases. Your soil needs to dry out a bit between waterings. It should be soggy after watering, then drain a bit, and then remain moist until the next watering. Your sol should not be wet or soggy except immediately after watering.
The second most common big mistake, after not enough light, is over-watering seedlings. People like to tend to and care for their pants so there is a natural propensity to over-water them. It’s two-part. Sometimes you just give that hydration too much or too often. Other times the soil or pot itself is the problem.
Whatever you are using as a pot needs to drain. It has to be able to drip excess water out the bottom so you don’t create a swamp. If you are using a very heavy, thick soil, You need extra drainage. I like one pencil-sized hole for every one or two square inches of bottom. That should do.
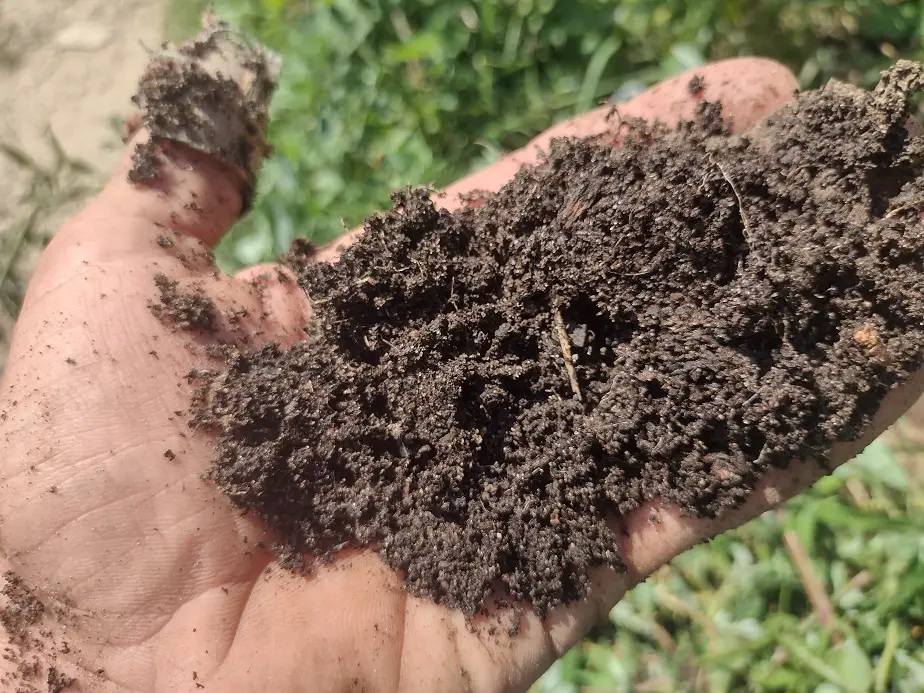
You also need to make sure your soil is able to drain. This is common when a soil has a lot of fine particles in it. A clay soil will do that. I have fairly silt-heavy soil, but it’s balanced out well with silica sand. I can use my native soil as a functional seed-starting soil if I treat it properly. I regularly use it as an ingredient in my soil blends.
You can read more about that in these articles:
- Potting Soil vs Garden Soil (differences and DIY recipes)
- How Much Biochar Can You Add to Potting Soil?
Use Larger Pots or Trays
Using too small of a pot for seedlings is a common mistake leading to sick or dead seedlings. The common-sized seedling pots sold at stores are too small for proper growth and health. They don’t hold enough soil, they have a poor height-to-width ratio, and plants quickly outgrow them.
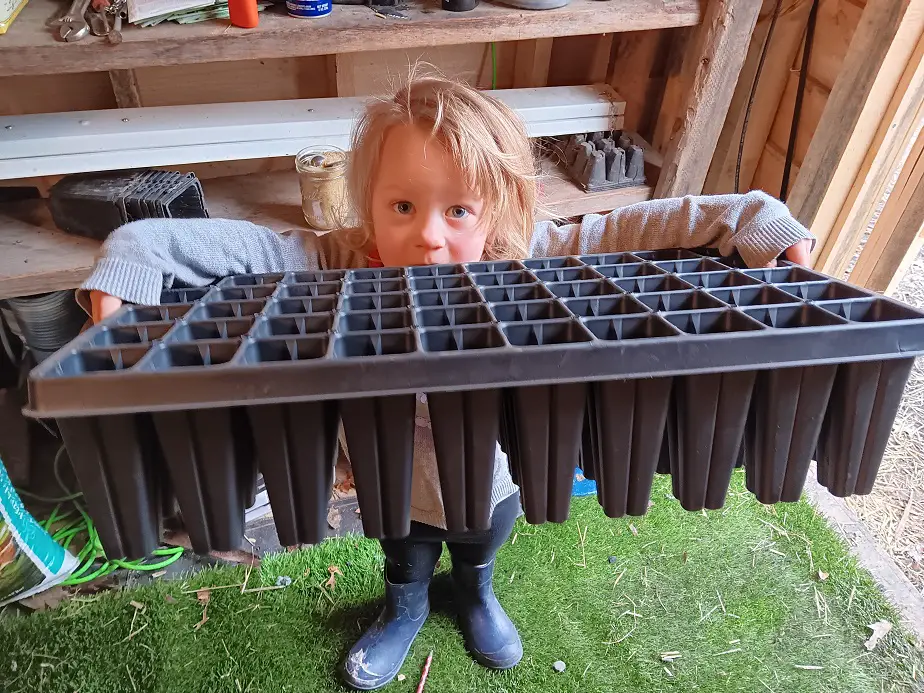
The two most common sized seed-starting trays are the 16-cell and the 72-cell disposables. I call them shorties because they are the shortest height of available options. These are designed to be cheap first and foremost. I like cheap, but I also need them to work. It’s usually around $7 to $10 for one set, a bottom tray, a seed cell, and a plastic cover.
I have decided to pay just a little more for tougher-taller pots that are sturdy enough for reliable re-use. I bought the cell inserts on Amazon and the bottom trays from my local hardware store for $1.99 each. You can also find them on Amazon.
The trays I really recomend are quite expensive and only available at Johny’s. They are 5′ tall, 50-cell Sunroot trays. The close second is a 3-inch tall 50-cell tray I found on Amazon. I would use these any day instead of the 72 or 16-cell trays they sell at most stores. I paid about three dollars each for them, hardly any more than regular cheap ones. Here’s a link to them.
Keep Lighting Close
Most artificial lighting sources should be within 8 inches of young plants and seedlings. Professional growers often prefer between 1 and 6 inches maximum between plants and a light source. Artificial lighting is not as strong as the sun and it diminishes quickly in short distances. Some lights lose 50 percent of their lumen strength in one inch.
I try to keep my lights between 1 and 4 inches from the tip top of my plants. It’s a careful balance. The closer they are, the higher intensity of light they can absorb. But, as I move them closer, the lights cover significantly less area. I struggle a bit with this balance of keeping within my lighting budget and having the intensity I really want.
With my lesser fluorescent lights (about 5,000 lumens per 2-bulb fixture) I need them quite close. These t-8, 48-inch lighting fixtures will cover two 10×20 trays quite well. My single tube LED lights with 8,700 lumens per fixture are not as wide, but they have a wider angle of reflection and are suited quite well to two 10×20 trays each. I am still deciding if I want them three or four inches above my plants. We shall see.
Related articles: