
Who doesn’t like sweet watermelons? Unfortunately, it’s not super easy in Michigan.
Plant watermelons in early-June for most of Michigan. You may have to wait two additional weeks in the Upper Peninsula. Watermelons can be started indoors 30 to 45 days early and transplanted in the ground when the soil warms. Check the local weather forecast for a late frost.
I’ll be the first to admit it, watermelons are tricky up here in the mitten (and da UP). Let’s talk about tips for starting and growing good watermelons despite a short growing season.
Direct Seeding Watermelon in Your Soil
The biggest hurdle in growing watermelons in Michigan is the high germination temperature requirements of melon seed. Melons have a best germination temperature of 90 degrees F. That’s a problem here. In west central Michigan, I don’t get those soil temperatures until nearly July.
Cold rains of late spring, while they fill up the soil, they’re detested by melon seedlings. When I plant them direct seeded in June, they just take forever to get started. It’s not until August that they really start putting out growth. The result is usually weaker plants with more damage and smaller fruits.
So, I don’t wholly recommend direct seeding watermelon, but I sometimes end up doing it anyway. Frankly, I don’t always have the space to start them indoors.
I have a few tricks to warm up the soil faster in the spring.
- Plant your melons in the spot that gets the most sun, and in the portion of that area that gets the earliest sun contact.
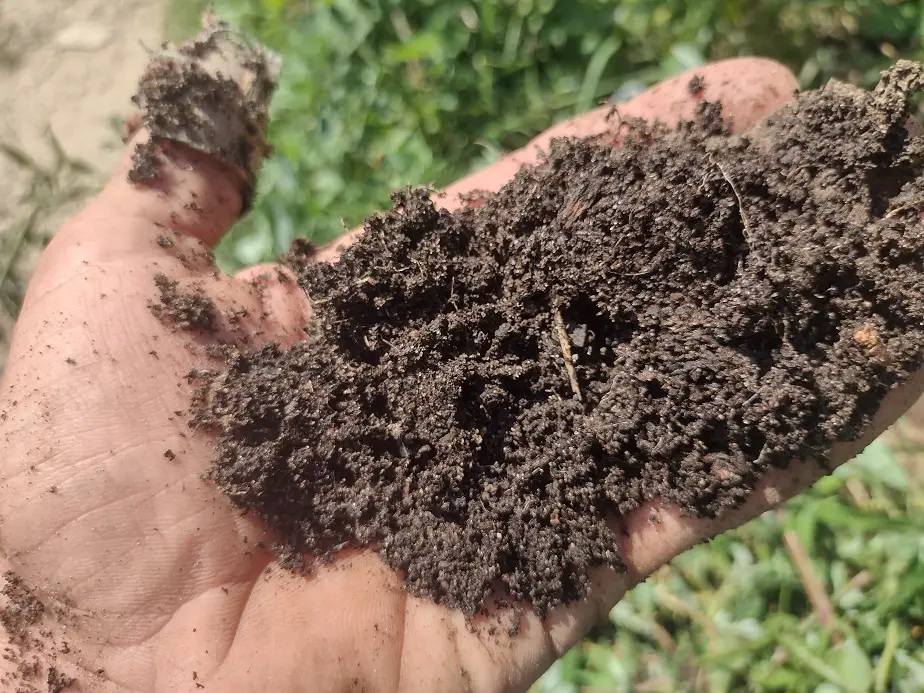
- Enrich the soil with compost. That makes it warm up faster in the day and holds heat better.
- Mulch heavily with grass clippings or aged horse manure. It will warm the soil. Clear a little spot (about 6 inches wide) to put your seed.
- Use a black weed barrier fabric to catch the sun’s heat and insulate the soil at night.
Those are a few things I’ve found that work for me. Beyond that, you better be sure the frost is well gone when you plant watermelons in the soil. Any hint of frost will kill the slightest sprout of a melon.
Still, you want a short-season variety of watermelon. Look for one that says 85 or fewer days to maturity. We grew Early Yellow Moonbeam this year. They were fantastic.
Look for the ideal planting moisture in the soil. Melons need a lot of water in the growing season, but they can’t tolerate soggy soil. Waterlogged soil at planting time may mean rotting seeds if it doesn’t dry up within a few days. You want the soil moist, but not muddy.
Check the forecast for the expected temperature of the coming week. If it’s going to get below 60 F, don’t plant watermelons yet. 60 is the limit of cold shock on most melons. cold shock often stunts plants, especially when young. It stresses them and leads to increased disease issues as well.
A different perspective
A friend of mine has grown several large fields of watermelon. They actually plant earlier because they have to hit the August sales market. We talked about it yesterday and he told me that he usually direct seeds in mid-May once the soil hits 46 degrees.
It won’t germinate at that temperature, but it’s going to keep warming up and will probably start germinating in two weeks or so. A big part of his idea is that after the soil hits 46 degrees, it will hold enough heat at night so the seedlings won’t kill off in a late frost.
Overall it’s a more risky planting method but his entire point is to get them to market early, when they have more value. It’s worth the risk to love one out of eight harvests or to lose some seedlings here and there. He grows seedless hybrid varieties.
I really do recommend starting watermelons indoors if you’re anywhere in Michigan.
Starting Watermelons Early Indoors
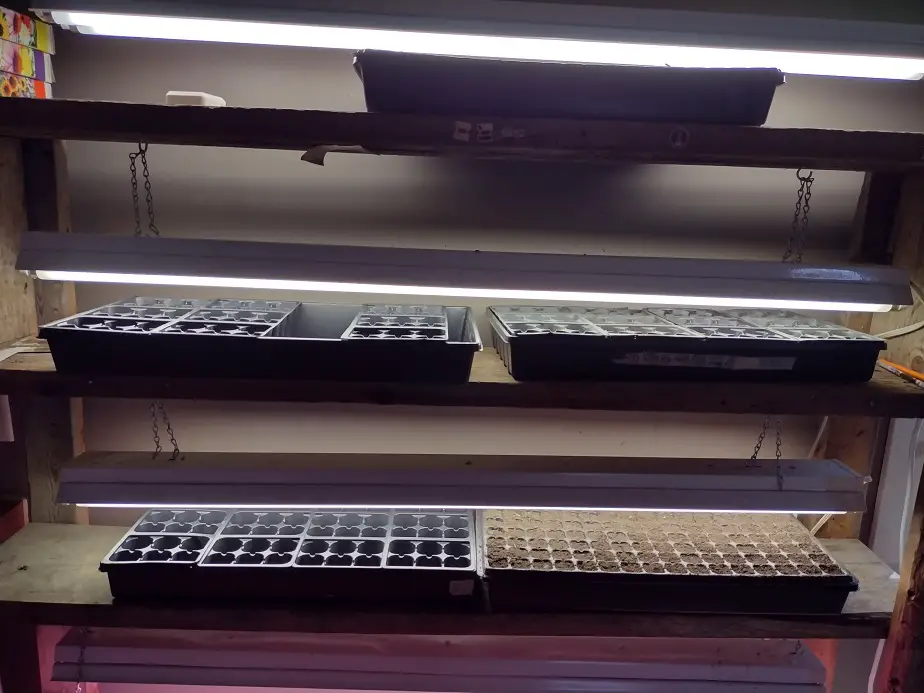
Start watermelons indoors mid-May in most of Michigan. Plant the seed in small pots or large-cell planting trays. Sow up to 2 seeds per pot or cell and water lightly. Cover and keep above 80 degrees until seedlings emerge. Keep seedlings a minimum of 75 degrees, warmer is better. Maintain good lighting.
It takes space to start watermelons indoors, but not a ton. Honestly, an old, cleaned out soup can would work for a pot, as long as it’s got a drainage hole in the bottom. I like to use pint-sized pots or larger for starting plants like melons. They really need space for their roots.
I wouldn’t start watermelon in the 10×20-inch seed starting trays you can get from most stores. They’re too shallow. Watermelon starts need more depth for their roots.
My favorite is the skinnier greenhouse-style trays that hold 8-quart pots. They’re available from greenhouse supply stores. I actually bought 2,500 of them from a blueberry greenhouse this summer. They work great and are the perfect size.
You need lighting for starting plants indoors. I would strongly advise against attempting to use window light unless you have a window that gets full sun, you keep it very clean, and you’re sure it’s not drafty or cold in front of the window.
For lighting, there are an assortment of LED plant light available today. I use old shop light fixtures with LED plant light tubes in them. I used to use a mid-spectrum fluorescent tube, but the LED plant light tube works much better.
Watermelon plants can get pretty big pretty quickly if conditions are optimal. They’re slow for the first two weeks, then they can explode. They grow a bit faster than a tomato plant. But, if conditions are sub-par, they grow quite slowly for a while.
A slight fertilization of fish emulsion 2 weeks after emergence is recommended for indoor starts. A plant heating mat is amazing for keeping pots and trays warm. I usually use the top shelf of me seed starting rack for warm-loving plants. It’s always a few degrees warmer near the ceiling.
If your plants are small and the weather is still cool, you may want to keep them in for some extra time; as long as they aren’t outgrowing their pots anyway. When it’s near time to plant them, I like to harden off cucurbita such as melons in a 4 or 5-day regimen. It looks something like this.
- Put them out for 1 hour the first day
- Put them out for 2 hours the second day
- Put them out for 4 hours the third day
- Put them out for 8 hours of sun the fourth day.
- Leave them out through the cool morning and all-day sun the fifth day.
Watermelon roots hate soggy soil. waterlogged or overly watered soil will cause a lot of seedlings to become weak and sickly or die. Keep the soil moist, not wet. Any decent potting soil works. I always make my own soil.
I wrote an article about Diy Potting Soil Recipies. Here’s a link to it.
Transplanting Watermelons
When transplanting watermelons, you want to avoid transplant shock. If you handle them roughly, if they get cold, or if you water them improperly, they get stressed and will not be happy. That stress stunts plants and increases disease susceptibility.
Transplanting watermelon from a warm place to cold soil is quite harsh on the little plants. Watermelons are originally from tropical Africa and they default to a long, hot, humid growing season. Cool weather is hard on them and they grow quite slow in cooler weather.
Speaking from the plant health point of view, you want the seedlings to take root and grow fast shortly after transplanting. If the soil is cold, they stay stagnant for a while.
In the spring, it’s somewhat rare to worry about watering transplants. If you have super sandy soil, you may need to water more regularly. Just don’t let the soil dry. It should always stay moist. And, don’t water it so much that the soil is often wet. Watermelons have shallow roots and wet soil hurts them after a while.
When transplanting, realize that watermelons have very soft, fragile roots. You need to be extra gentle with them. Fluff the soil, make a hole, and carefully pop out the seedlings and soil in one. Set the melon in the hole no deeper than the top of it’s potting soil level. Gently pack the dirt around it and water lightly.
Be careful of the stems too. They break easily. Ask me how I know.
If you don’t harden off your transplants, They’ll likely get sunburn. I’ve had this kill off large portions of a transplanted crop before.
Good potting soil improves transplant success. Understand the ingredients and consider making your own. Read this article: Potting Soil vs Garden Soil (differenced and DIY recipies)
Prepping the Soil for Watermelon Season
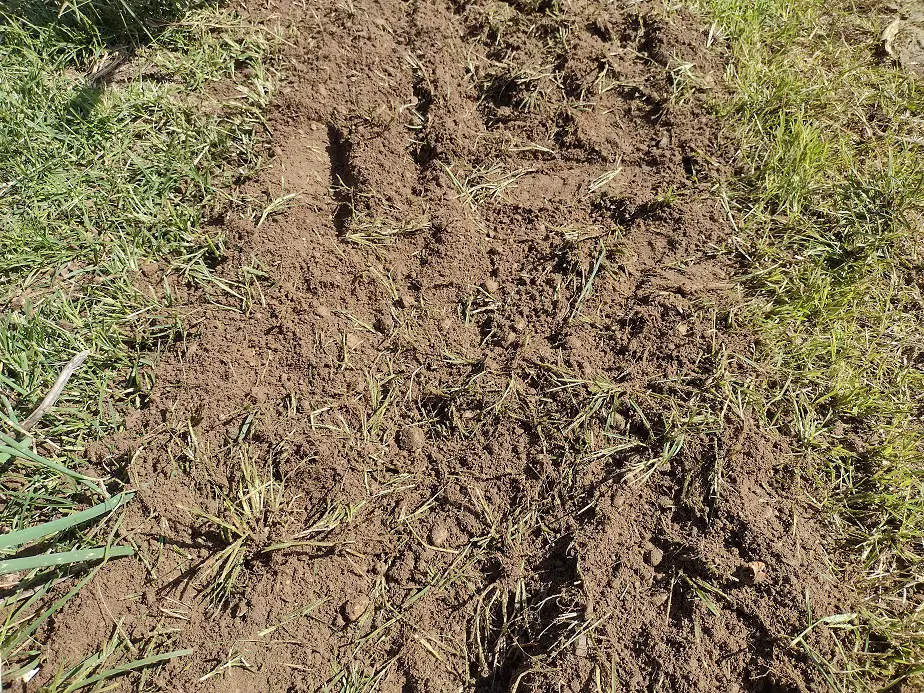
Before planting either with direct seeds or transplants, make sure the soil is soft. Break up any compaction, add organic material, and do a soil fertility test. I like to add a good amount of manure and hoe it in. The soil should be a soft texture for seedlings to root well.
Basic amendments like compost or alfalfa meal are useful at this time. It will take time to break down so I like to incorporate organic soil-feeding ingredients well before planting. Even grass clippings, if you have them, work to fluff up and feed the soil.
You may want to apply a dose of fertilizer pre-planting. I use manure as our pre-planting fertilizer.
Fertilizing Watermelons
Organic or synthetic fertilizers can both be fine for watermelons. generally, a high er nitrogen application is preferred early on, and low to no nitrogen application fertilizers after the blossoms show up. They have a moderate requirement for plant nutrients, similar to pumpkins and cucumbers.
The crop is usually fertilized at a rate of around 100-120 lbs. N, P, and k per acre or about 1/3 ounce per plant. If your soil is very sandy, you should add 50 percent to that.
It’s usually applied twice. The first half at or just before planting, and the second half once the plants just start sprawling a bit, after 30 days or so.
For a small garden, look at the numbers on your fertilizer and calculate how much you’d need. Consider approximately 1/3 ounce each of nitrogen, phosphorus, and potassium per plant. However much that is, apply half now and half later.
Work it into the soil within a foot of either side of your planting area and water it in well. Do it the same with the second application.
I wrote a full article on using manure in your garden. Here’s a link to it.
Growing and Tending Watermelons
Hoe or pull weeds regularly. Watermelons are low-growing, sprawling plants and are easily shaded out by our native weeds. Good weeding improves plant health and increases your harvest. Keep the plants in the sun, and let the top of the soil dry out during the day. That helps prevent fungal issues.
Soil with a high amount of organic matter grows healthier plants. Just something to remember. Don’t rototill or hoe deeply within 2 feet of the plant’s base. That can hurt their root system.
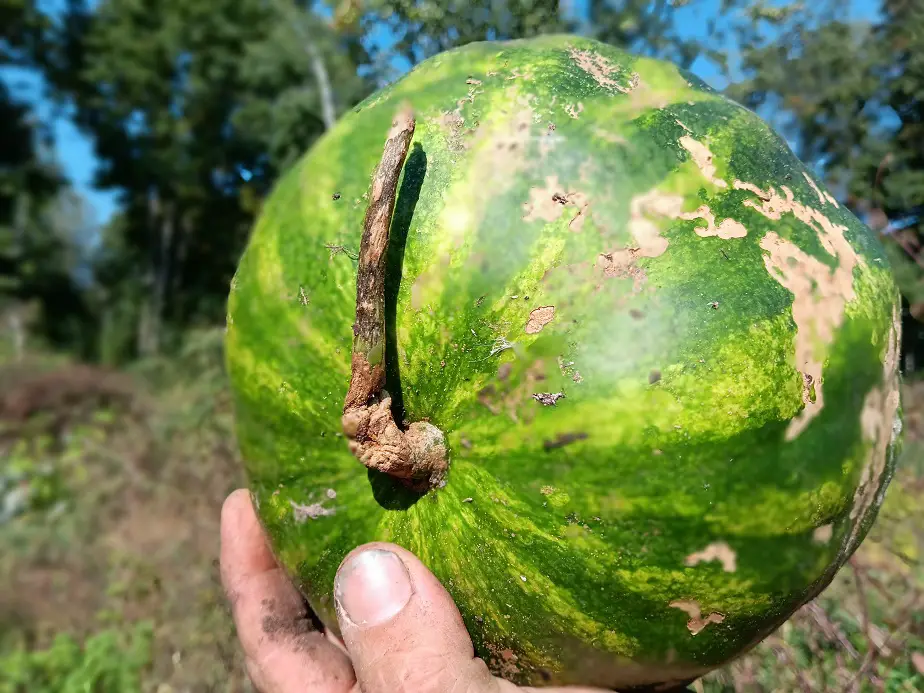
Pick them after the stem starts to shrivel or dry up connecting to the fruit.
Related Articles: