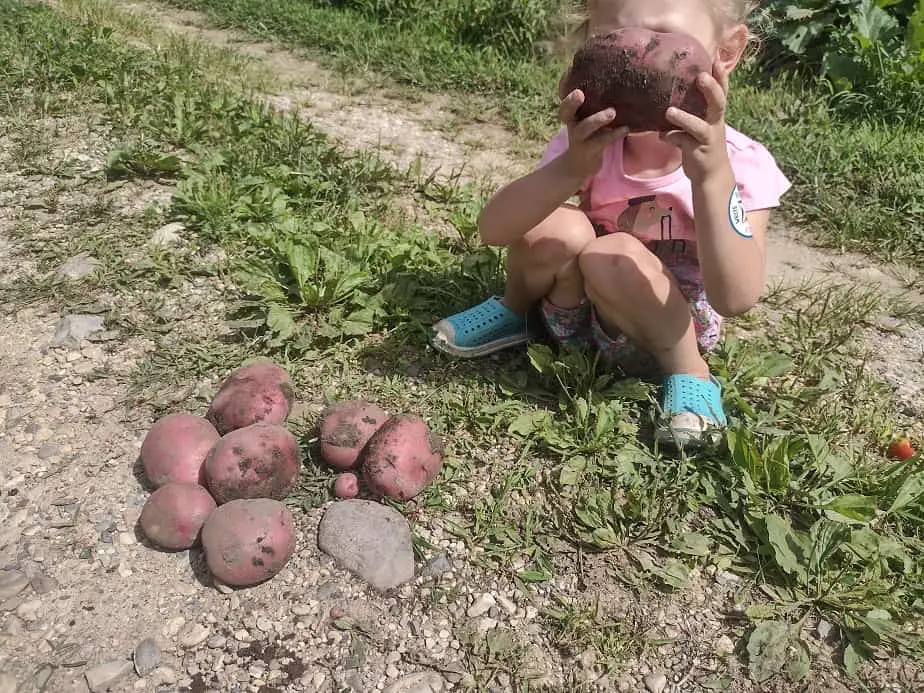
Potatoes are one of the most reliable food crops to grow yourself. It’s quite simple to grow several hundred pounds in a fairly small area.
To grow big potatoes you need very fertile, loose soil, plenty of water, and some cool weather. Potatoes are heavy feeders and need a high dose of fertilizer and constant moisture to grow big. Heat will stunt potato size. Pest infestations can also greatly limit tuber size.
Growing the Biggest, Best Potatoes
Potatoes are a heavy-producing crop. That means they need a lot of food and water to be happy. Potatoes need at least as much fertilizer as corn, sometimes a bit more. It’s key to getting the fertility built up properly for potatoes. Most people I’ve talked to have misconceptions about it.
Potatoes need more nitrogen than anything else, like all garden vegetables. That’s the main issue. Most gardeners use a 10-10-10 type fertilizer with equal amounts of nitrogen, phosphorus, and potassium. Trouble is, it’s not the best blend for potatoes or most anything.
If you fertilize with a 10-10-10 or 20-20-20 fertilizer, you will either have too little nitrogen, or too much phosphorus. Both are bad. Too little nitrogen won’t let the plants get big, resulting in small potatoes. Too much phosphorus will lock up the nitrogen and potassium in a form plant can’t use.
In fact, that’s such a problem fertilizers containing phosphorus are illegal in Michigan for non-commercial use on lawns, without a soil test proving it’s needed. It’s not an enforced rule, thank goodness, but a decent fertilizer did get harder to find.
I like to prep the area in the fall, piling it high with leaves and manure. in the spring, when the potatoes are planted, I will add either chicken manure or urea fertilizer for the nitrogen content. I check the soil fertility once a month to make sure it doesn’t get very low.

Fertilizing Potatoes
Potatoes need 200 to 230 pounds of nitrogen per acre or about half a pound per 100 plants. A 10-10-10-or 20-20-20 fertilizer can work, but should probably be balanced with urea to create a more suitable blend for growing potatoes. Potatoes also need a lot of magnesium to grow well.
To check the soil fertility, I recommend the LusterLeaf 1602 sol test kit. It’s cheap and works the best. If the soil tests out high, or “SURPLUS” on the tester, I’ll call it good and leave it there. If not, the soil needs more. If the fertility shows less than halfway up the scale, it’s probably okay to use regular fertilizer.
If your soil tests very high in phosphorus but not the others, look for a phosphorus-free fertilizer for the next couple of years. If you need to add fertility, I bet you do, start with 1 rounded teaspoon of 20-20-20 or 1 level tablespoon of 10-10-10 per plant. Sprinkle it around and water lightly to help it soak in.
I like to use that same measurement, but with my own simple fertilizer mix. I mix even parts 20-20-20 and urea (46-0-0), then sprinkle a teaspoon worth per plant. Now, that’s just the first fertilization. Three to four weeks later, you need to test the soil again.
As long as it’s not showing top-end results (on the LusterLeaf 1602 soil test kit) apply the same amount again. In fact, if the results are below halfway you should probably add another 50% to top it off. Test again in another 3 or 4 weeks to see how it’s going, but also watch the plants for signs of good growth.
It’s hard to guess the below-ground growth of potatoes. Healthy potato plants should end up with between 4 and 6 pounds of spuds per plant, depending on the variety. You can guess by the size of the plants, but ultimately you will have to see if your harvest is what it should have been.
I used to consider acidic soil, pH 5.0, to be necessary for big potatoes. Not anymore. My soil has a pH of 6.8 and my garden grows some most excellent, large potatoes. Potatoes don’t like acidic soil, they need to eat a lot. It’s more appropriate to say they can tolerate highly acidic soil well.
If you have soil with a high amount of organic matter and natural fertility, you can grow big potatoes in regular garden soil of 6-7 pH. The nearly one-pound potatoes in my pantry speak for themselves.
I know that

How Much do Potatoes Produce?
You can harvest several hundred pounds of potatoes per 100-foot row. Depending on the variety and when you harvest, you can sensibly expect between 1 and 5 pounds per plant. Large varieties like Kennebec and Russets should be in the 4-6 pound range, 6 being the goal.
Mid-sized varieties like Northland red or Irish Cobbler are more of a 4-pound per plant variety. Fingerling-type potatoes usually range from 1-2 pounds per plant on average. For novice growers, 2-3 pounds per plant is a good general goal.
Commercial growers target these numbers, or lower if they don’t have irrigation, Home gardeners can often produce better yields because they can afford the extra plant tending and care to make really happy plants. Basically, most commercial growers have crappy soil.
The best tip I can give you is to have very black, carbon-rich soil. That’s the one thing that works to balance out almost all the problems that arise. Good soil, stuff that’s really black and fluffy, stops fertilizer leaching, holds water for plants, and helps the soil drain and aerate.
If you are building up the soil’s organic content with leaves, grass clippings, compost, or other such things, you probably won’t have a magnesium shortage and should be fine with the micronutrients too.
The Best Climate for Potatoes
Potatoes are a cool weather crop and don’t grow well in hot climates. States in the Midwest, such as my home state of Michigan, are great climates for a good potato crop. They are best planted in the early spring. In places with cool summer nights, potatoes can be planted in early August for a fall harvest.
Potatoes love temperatures in the 40s (Fahrenheit) for the first month after planting, and really need the first month or more to be lower than 67 degrees. That keeps the seed potato from rotting in the ground as it feeds the new shoots.
Some gardeners, myself included, will plant them sixty days or more before the last frost date. It runs the risk of freeze damage to the young shoots and waterlogged spring soils rotting the seed potatoes, but I outweigh that by ensuring good drainage.

Preparing Potatoes for Planting
Small seed potatoes, 2-3 inches in diameter, can be left whole or cut in half, ensuring 1-2 sprouted eyes at a minimum per piece. Larger pieces should be cut to not much smaller than 2-inches, trying to keep at least 2 sprouted eyes each. Be gentle with any shoots growing from them. They break easily.
Look for eyes that have a little white or green growth coming from them, even if it’s just a speck. Most eyes will sprout, but two sprouting eyes will start growing roots from 2 places at once. like to lay them out, cut side up overnight so the cut scabs over. That way they rot less in the ground
The Lazy Bed planting method is planting your potatoes under a heavy layer of loose mulch. The mulch acts as a good, water saver, and makes it super clean and easy to harvest. For this planting method, prepare a bed of soil just wide enough for to reach into the middle without stepping or falling into it.
Lazy beds should be no more than six feet wide. In six feet you can plant four rows deep After you have placed your prepared seed potatoes a foot apart, firmly press the cut side down into the soil.
Instead of burying them with dirt, place a thick layer of straw, hay, or shredded leaves over them. Six inches of bailed hay or straw will do. Immediately spray it all down with water. That will weigh t down and cause it to settle together so the wind doesn’t blow it away. One bale will do an average-sized bed.
The more common method is row planting. That’s what I usually do. The traditional row planting technique is more labor intensive but grows good quality tubers. To plant in the traditional manner, dig or hoe a trench six inches deep down the entire length of your planting area.
Set your prepared potatoes, cut side up, and a foot apart. Put a little manure, compost, or mulch on top if needed, then cover with three inches of soil. Your potatoes, when planted, should be about twenty-eight inches from the potatoes in the next row.
As the sprouts come up hoe up a few more inches of soil at a time. eventually, you will have a wide hill where the trench was. All in all, there should be about eight inches of soil on top of your seed potatoes. This hoeing keeps loose soil where the new potatoes will be forming.
A little mulch covering your rows will keep the soil loose and moist as the plants mature. If heavy rains are an expected problem, or suddenly become one, hoe your hills a little higher, or dig shallow trenches between hills to drain the water away.
If you ever have standing water in or between your rows, you need to cause it to drain off. Waterlogged soil may rot the potatoes right in the soil. For this reason, they are well suited to planting on slight slopes or well-drained soil. if planted before spring rains come.
Frost can slightly damage the edges of leaves, and the newer growth leaves on the plants. A severe frost, what we’d call a light freeze can hurt the young shoots of your potatoes. If there is a chance of frost, young shoots can be covered with soil, sheets, or mulch to ward off damage.
If there is a heavy frost or a good freeze, cover shoots with a thick layer of mulch, and lay a sheet or towel over the mulch. Cover larger plants with towels, bed sheets, sheets of plastic, or whatever you can find. I plant mine quite early in the spring and heavy freezes are a concern.
Saving Potatoes from Pests
You can do it too if you watch the weather and act fast with precautionary measures. Keep an eye out for leaves that look chewed up. The potato bug is a nasty little yellow grub that turns into a yellow stripped, round beetle. They can spread fast and destroy the foliage, damaging your harvest.
If you find bugs eating your plants, you need to go through and check each plant. look under the leaves, where the eggs are usually found. squish any bugs you find. If you find yourself needing more satisfaction, dump them in a can of kerosene and set them ablaze as a monument to your victory.
Okay, that’s a bit extreme. The two biggest things you can do to save potatoes from pests is growing healthy plants, and checking them daily. Make it a habit to walk out there and glance at the leaves for bugs or signs of damage.
I cannot advocate for the industry standard insecticides. They are dangerous and negatively affect the soil. The most effective method to control bugs on your potstoes is your fingers. give them the ol’ squish squish. it works well but takes time. If things are getting out of control, I have one secret trick.
It’s not really a secret, just not publicly known. I had a terrible problem with blister beetles eating my potato leaves. Blister beetles are known for being resistant to almost all insecticides so I was about to sound the retreat.
Following the advice of an entemologist (bug scientist) I happened to talk with, I mixed up a sugar water solution and sprayed it on the plants. By the next day, the infestation turned into just a few here and there.
Sugar water sprayed first thing in the morning before direct sunlight shines down, will be absorbed by plant leaves. That puts unusually high levels of sucrose in the plant. Most leaf-eating beetles can’t handle sucrose. it ferments in their gut, which tends to kill them with a deadly case of indigestion.
3-oz of sugar to a gallon of water, spray it early in the morning so it soaks in before drying out. I did it, and it worked. That seems to have saved over half of my potato harvest. The trick is getting the right amount of spray. I went with what I considered a little heavy, more than a light misting.
Since it’s just sugar, it poses little risk to even a very stressed-out plant. I tried it this year for the first time, and will definitely do it again. I would love it if other people could help me further test this method.
Related Articles:
I didn’t know about the sugar water. It is a very good tip and gets me away from extreme pesticides. I thought I was fertilizing and placing enough organics in an on the soil, but according to your article I am not even close. I am having an issue of small tabors with some medium sized ones. I was thinking I was good enough with the fertilizer due to large dark green tops. I see now I need to ramp it up some for a better harvest. I went 4 years without any potato bugs, but last year they hit me fast and hard. It was almost over night that they came on. I want to thank you for the information and wish you a great growing season. If you have some hints on growing cabbage I could use them. My heads are small and I lose at least 50 to 75 percent of the plants dying before a head develops. I have sandy soil and unable to acquire manure of any kind. Since 2015 I have been fertilizing, using composted food waste, and leaves to try and build the soil. The ground was feral for many years before I got a hold of it. Any help would be appreciated. thank You.
What region are you growing in? Sometimes Potato Beetles just come through an area, but that class of insect is often a sign of improper mineral uptake in plants. If you have not done so, I greatly reccomend Sending a soil sample to a lab. Redmond Agriculture has a kit you can buy that comes with a pre-paid envelope to send in yur soil sampe. I personally use that one because it’s super easy. Sandy soil it tough. I grew up on Michigan savanna land, next to sand dunes. But, it can be done. I would cautoin against putting down too much fertilizer at one time, It’s hard on the soil microbiology.